
Well i clearly did not have a very good time learning to setup Continuous Integration on a Ubuntu VM that i created. So i wanted to share the steps i did to make this work. 😅
Lets get started with the process.
So first things first, you need to install Jenkins and Git on the Ubuntu VM.
Jenkins installation is pretty straightforward, i followed this article to get it running https://linuxize.com/post/how-to-install-jenkins-on-ubuntu-18-04/
Tip — I have seen we would get into issues if you try installing Jenkins with JDK7, use JDK8 as mentioned in the article and things should be fine.
Install git using the following command
sudo apt-get install gitWhat is BlueOcean and why are we using it.
Basically BlueOcean is a modern way to creating a CI/CD pipeline in Jenkins. It is rather simple. The best part about this is you can visually create a pipeline and add steps to each of the build stages. Will talk more on this in a while firstly lets get this configured.
You need to install the ‘Blue Ocean’ plugin in Jenkins for this. You can read this article to know a bit more on this https://jenkins.io/doc/book/blueocean/getting-started/
Now the steps to integrate Github and BlueOcean are below.
At this point if you do not have a github account, Please get it and create a public repository (to keep things simple, for private repos additional authentication is needed) with any name.
Since Robot Framework works on python, please install ‘python3’ and ‘python3-pip’ on your Ubuntu (if needed)
sudo apt-get install python3
sudo apt-get install python3-pip
I will be using some Robot Framework code because its insanely simple to quickly add tests. I have created a repository called ‘blueci’ in github in which i have defined 4 tests which we will make use of in our deployment pipeline. So you may choose to clone this repository and use it as well. Make sure you push the same files to you githhub so that we have some tests in our pipeline. https://github.com/joydeep100/blueci
Firstly blueocean UI can be accessed by adding a blue path name after your jenkins installation, example http://localhost:8080/blue
Click on New Pipeline.
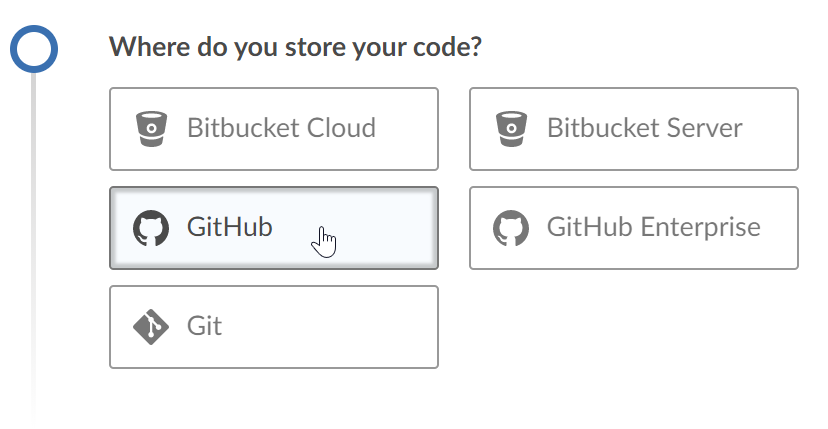
- Select GitHub
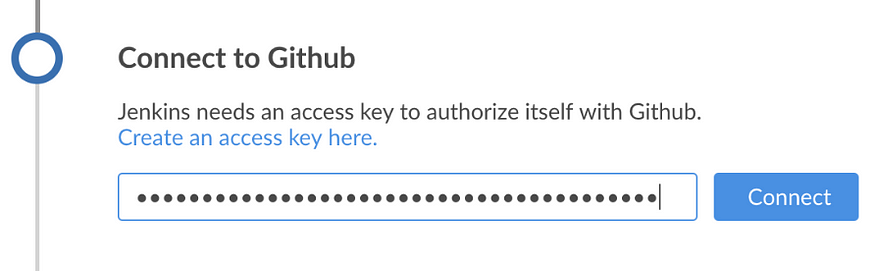
- Create a access key in Github and Connect this.
To do this go to https://github.com/settings/tokens ,generate a new token and paste this in the Jenkins UI to authorize jenkins to read your github data. Make sure that the below permissions are present when you generate the access key.
read:user, repo, user:email, write:repo_hook
Once this is done select you Organization, which would be your github avatar.
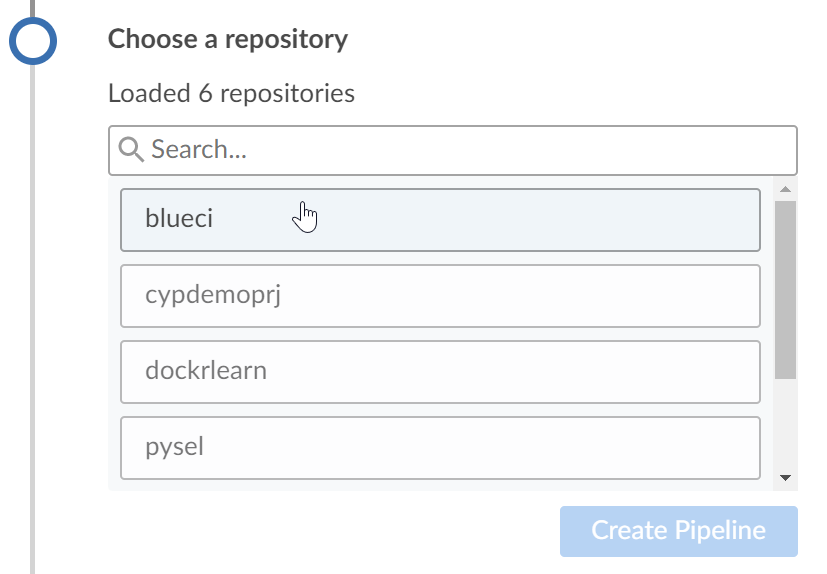
- Then choose your testing repository and click on Create Pipeline. It would say no Jenkinsfile found and take you to the pipeline creation page.
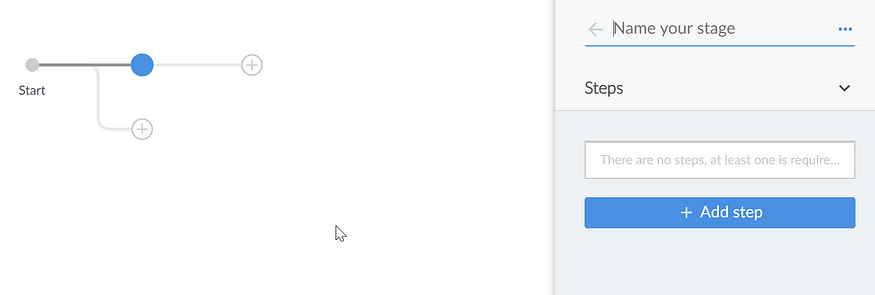
Now lets try to build a workflow and generate the Jenkinsfile using the GUI mode. You can also use some code to build you Jenkinsfile which we shall look at little later. But this approach is the simplest way of generating your Jenkinsfile.
Click on the + icon and you should see the below screen.
Now lets understand what could possibly be our workflow.
a. Install the dependencies to run our tests (Build Stage)
pip install -r requirements.txt
b. Run all the tests (Testing stage)
robot tests/tests.txt
c. Archive the report (Reporting stage)
- Step b, would produce 3 files which we need to archive
report.html, log.html, output.xml
note that if any of the steps fail, Jenkins would return an exit code which is not 0 and hence the build would fail and after we have integrated it with Github, git also would mark the build as failed.
So lets add 3 stages(without any steps for now) in BlueOcean pipeline editor and add the same steps. It should look something like this.
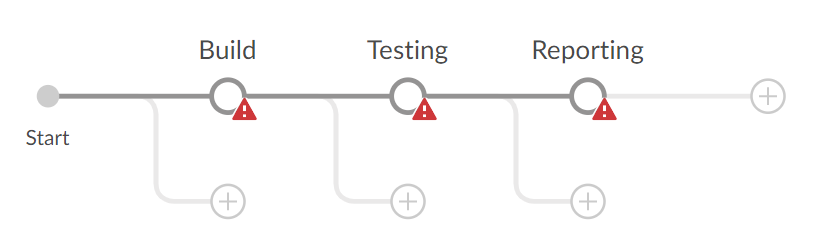
- Noticed the little warning icon, it means that we have not defined any steps. So lets do that.
a. For the Build stage, click on build circle icon.
- Add step “Shell script”
- Paste this
pip install -r requirements.txt
note: We are adding step as “Shell script” since we want to run shell commands and our OS is linux
b. For the Testing stage, click on testing circle icon.
- Add step “Shell script”
- Paste this
robot tests/tests.txt
c. For the Reporting stage, click on reporting circle icon.
- Add step “Archive the artifacts”
- Paste this
report.html,log.html,output.xml
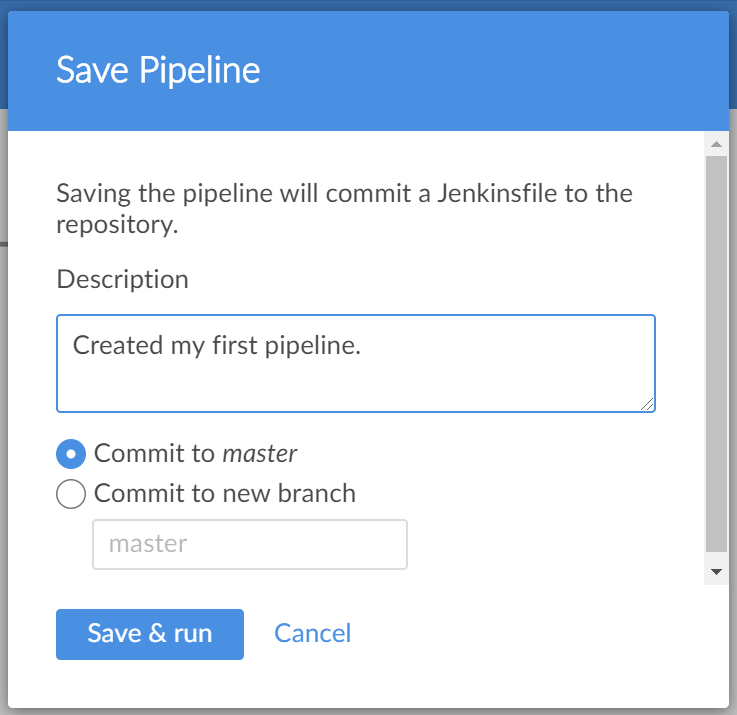
- Now save this and make a Commit to master.
This should trigger a build in jenkins. There are a couple of this that would happen st this point.
Jenkins will clone your repository in its WORKSPACE, which by default is /var/lib/jenkins/workspace/
After this step it will try to run instructions that we have given as part of the Build, Testing and Reporting stages.
If things are fine you should see the below screen.
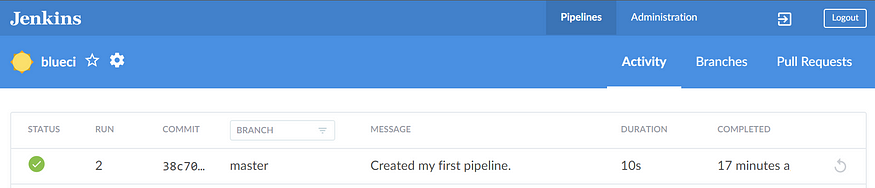
Well we have made it halfway through if you are seeing this 🎉
side-note: Also one more thing is when you Saved the pipeline, and did Commit to master. Jenkins automatically converted your steps to a Jenkinsfile which should get added to your repository in git. Now instead of doing the steps from GUI we could have also defined it in this file. Its quite simple groovy scripting and you can leverage it for subsequent projects.
// file :: Jenkinsfile
pipeline {
  agent any
  stages {
    stage('Build') {
      steps {
        sh 'pip install -r requirements.txt'
      }
    }
    stage('Testing') {
      steps {
        sh 'robot tests/tests.txt'
      }
    }
    stage('Reporting') {
      steps {
        archiveArtifacts 'report.html,log.html,output.xml'
      }
    }
  }
}
Now we have to configure GitHub so that when ever there is any event such as Creation of Pull Request, Commits to the repository to trigger the build in Jenkins.
The way this is done is using webhooks, which when setup can send a POST request to Jenkins to inform it to start the CI pipeline.
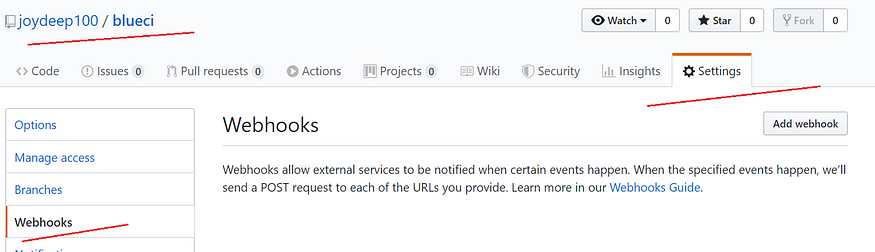
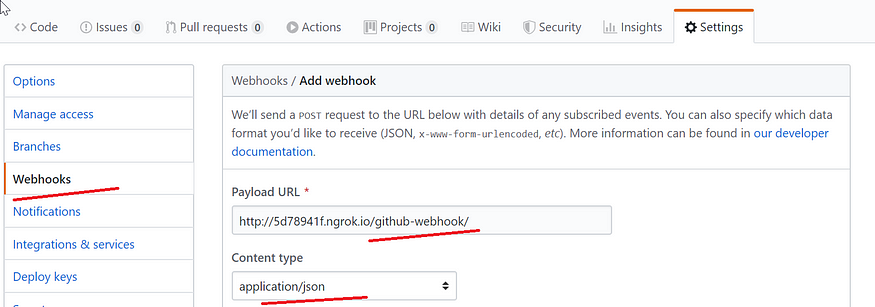
Login to your GitHub, go to you repository -> Settings -> Webhooks.
Now we have a problem, you are running Jenkins on you local VM. How would github send a POST request to your local machine from the internet. For this we can use a utility called ngrok.
Go to ngrok.com, follow the simple steps and run ngrok as follows
./ngrok http 8080
This tells ngrok to map port 8080 of your local which is the Jenkins Server default port to be made available through internet. You should see something like this. Keep this window running.
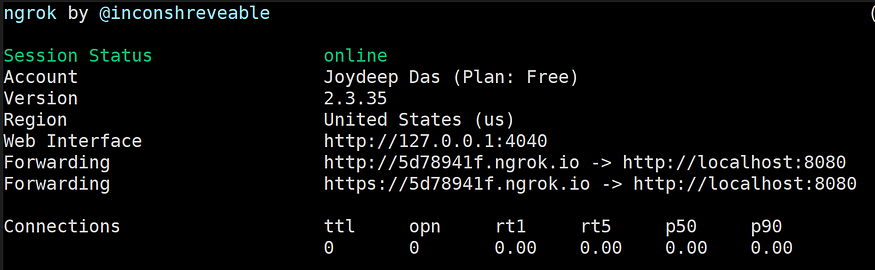
Now add a webhook, copy the forwarding url from the ngrok console and append the string ‘/github-webhook/’ , example `http://5d78941f.ngrok.io/github-webhook/` and select content-type as `application/json`
Now under ‘Which events would you like to trigger this webhook?’ i suggest you use the below 2 options for now.
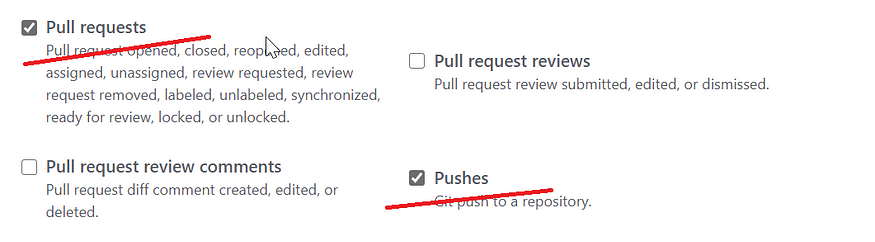
If you see a little ✔️then you are good to go ahead.

Else click on this link, the would be a recent deliveries section in the bottom, you can check what error you got it in the response packet and try to investigate accordingly. I did get some errors here one was the crumb error and other was some authorization error. Which i was able to fix after doing some google search. Just letting you know.
Alright! now lets try to see if this all works.
Go to your github repository, Lets try to add a new readme file which will trigger a new commit and see if jenkins picks up a new job.
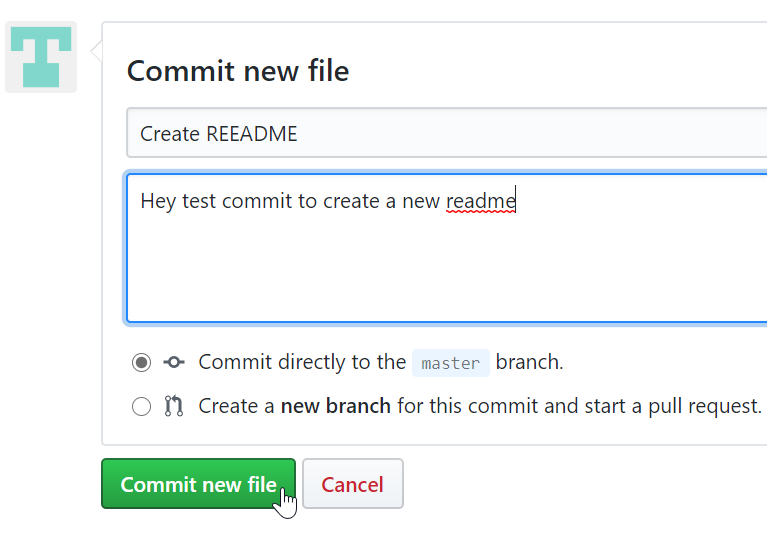
Lets commit this code.
You should see this in Jenkins.

Awesome. You are technically done with the CI workflow.
Now i wanted to see a bit more so i cloned the repository, created a new branch made a commit & push. Created a Pull Request to things in more details. Let me walk you through this.
git clone https://github.com/joydeep100/blueci.git
cd blueci/
git checkout -b new_branch
#making some test changes in readme.
vim README.md
git add README.md
git commit -m 'made some tiny little test changes in readme'
git push -u origin new_branch
Now went to github and created a New Pull Request.
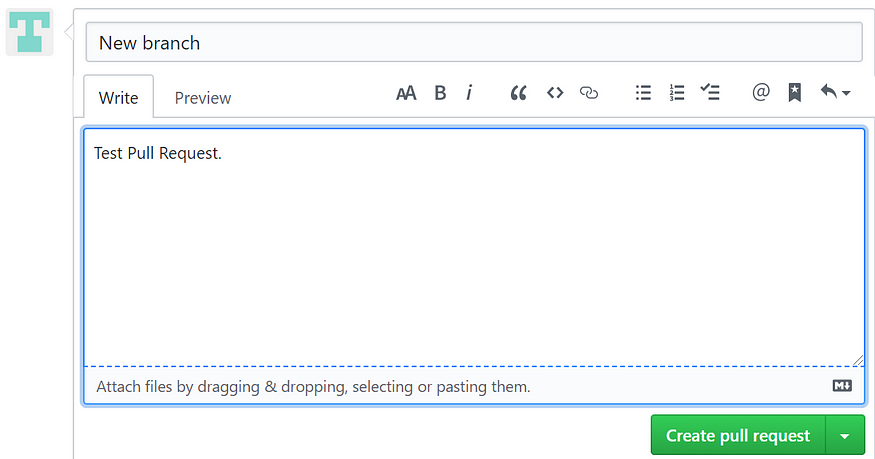
Github now automatically triggers Jenkins and we can see it here.
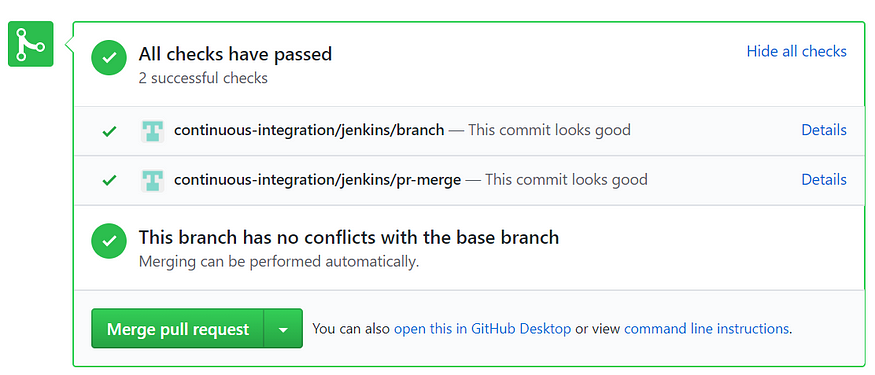
The status can be also seen in Jenkins.

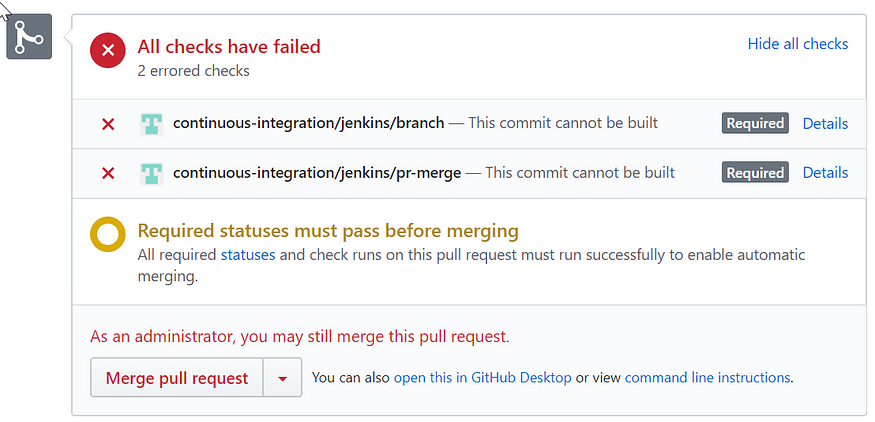
Also it’s super fun to see a failed build right, I have also configured a rule to not allow merging when build fails. So it looks ever nicer.
Fantastic for making it till here. Feel free to send me your suggestions.